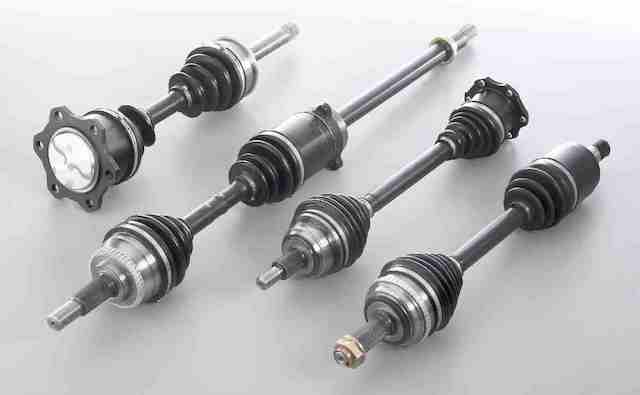
Product Description
Trailer Avonride Unbraked Hub Stub Axle Kit (100mm PCD)
Specifications:
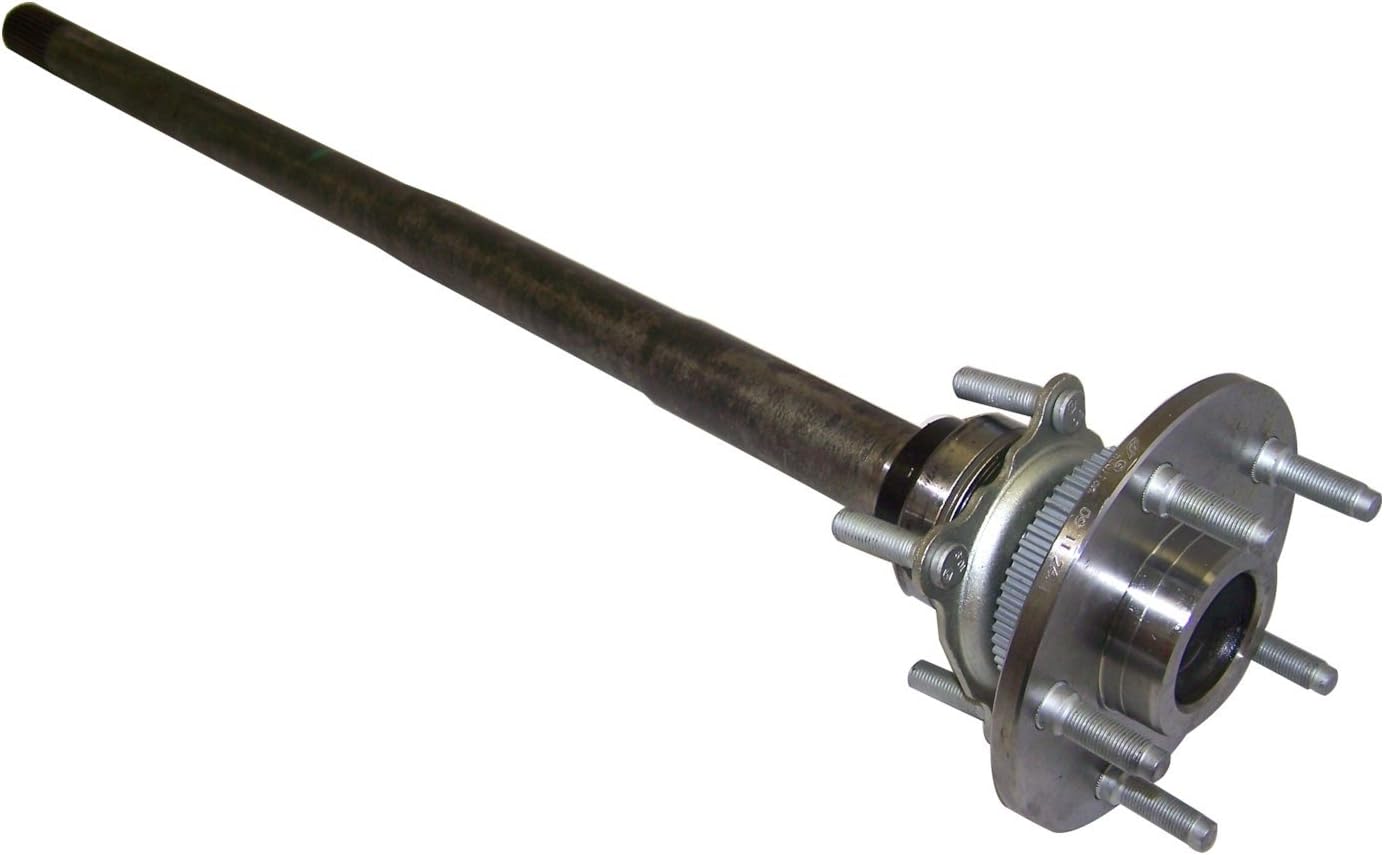
The Trailer Avonride Unbraked Hub Stub Axle Kit includes everything you will need to replace your trailer Avonride unbraked hub and stub axle. The hub is fitted with a sealed bearing and has a 100mm PCD measurement. It fits a 50mm (2″) box iron with a 5mm wall measurement – the stub axle is 50mm x 50mm.
- Hub kits to fit on a new or existing trailer axle
- Hub and stub kits that also include a weld on stub axle
- Braked or non braked hubs, disc brakes or drum brakes to suit a range of applications
- Wireless trailer brake controller systems
- Non-braked hubs and braked hub options
- Comprehensive spare parts, such as brake pads, stub axles, seal kits etc
| Part Number | Wheel Load | Stub Axle Size | PCD | Dust Cap Diameter |
|---|---|---|---|---|
| TA014 | 750 kgs | 50mm x 50mm | 4-100 | 55MM |
BUILDING A STRAIGHT BEAM AXLE – SHIM METHOD
NOTE – Building your own axles should only be undertaken by a skilled and proficient welder. Good weld penetration with no porosity or undercut is required to ensure the strength and integrity of the axle is not compromised. If you have any doubts about your skills, leave axle building to the professionals, poorly built and poorly welded axles can cause accidents and kill people.
Straight Beam Axle Setup – Shim Method
There are many ways of setting up stub axles within axle tubes correctly, the following is a tried and tested method that almost anyone with minimal equipment can accomplish.
Getting the stub axles perfectly parallel and true to each other is the difficult part of building your own axle. Getting it wrong will cause a multitude of problems, from poor trailer tracking behind the tow vehicle, premature bearing failure, excessive tyre wear, blowouts and even broken stub axles.
If like most home workshops, you will be lacking a lathe with a 4 jaw chuck and head bore to handle a 50 x 50 piece of axle tube or have a bed length to cope with a full length trailer axle, so you will have to improvise to compensate.
If you are not using machined line pipe for your axle tubes, you will need the following equipment –
• Vernier calipers with internal jaws
• A new tape measure (no wear/sloppiness and easier to read)
• Selection of shim steel including some various sizes of panel steel 0.5 to 1.0mm thick
• Tin snips/shears and scissors (don’t use your wifes ones!)
• Soft face hammer (a shot filled hammer is ideal)
• Set of flat files
• Square
• Flat straight work surface
Ideally you want to get a cheap set of bearings to match the good ones in you new hubs. Using a brass or mild steel drift, carefully remove the good bearing cups from the hubs (put them away somewhere nice and clean) and fit the cheapies. You will need the hubs to be dry fitted (no grease) to the stub axles later on to double check measurements and it is preferable not to do any welding or dusty work in and around your good bearings.
A note about welding axles – to prevent damage to the hub, bearings and stub axle, earthing the axle must be done through the axle tube only. If necessary, tack weld a tab or bolt to the axle tube to allow easy attachment of the earth clamp.
An issue with using ERW/welded pipe as axle tubing is the seam weld internally running the length of the pipe. You can work around this if the seam is of a consistent depth or offset from the centreline of the section (SHS only), but the best thing is to get rid of it. If you are CZPT to access one, beg, borrow or buy an electric file (like a belt sander in miniature). This will considerably reduce the time, frustration and damaged fingers from doing the job manually.
The second best option is to tack weld a 250mm long, 2nd cut or bastard file CZPT the end of a length of 25 x 25 hollow section or similar. This will give the file extra leverage and cutting power and assists in getting deep inside the axle tube.
Clamp the axle tube to whatever will hold it steady and with the seam at the bottom, pass the modified file over the seam and file it flat. You will only need to file around 150-200mm of the seam at each end of the axle tube, but take care that you do not file past the seam especially at the outer edge of the tube. Here there is a tendency to taper off at the opening.
Axle tube length for straight beam axles is pretty straight forward, if the stub axle has a hydraulic caliper yoke or drum brake backing plate mount, the axle tube can butt up against the flat surface of these and welded around. This doesn’t work in all situations, and you may need to set the axle tube 20 mm or more back from the yoke/plate to get good stub axle alignment and weld penetration.
If a non braking stub axle is being fitted, the axle tube should not be closer than 25mm from the seal shoulder (the last bit of machined surface).
With the hub dry fitted (with the cheap bearings), measure from the hub face back to the 25mm mark on the stub axle. Double this measurement and subtract it from the original hub to hub face measurement. This is the axle tube length.
Once the axle tube has been cut to length, remove any burrs inside and outside and if required, file the internal seam flat.
Drill a couple of plug holes in the axle tube at least 12mm diameter, preferably larger so that the stub axle can be secured at the back end with some good welds.
With the Vernier calipers, measure across the inside flats of the axle tube and the diameter of the stub axle. Find the difference between the 2 (the total gap) and divide by 2.
Cut up 4 sets of shims, for each stub axle, to the thickness of the ½ gap measurement. If using a mix of thick and thin shims, try to slip the thin sections inside a sandwich of thicker shims and use a thin layer of grease/oil to help keep the shims together. The shims should ideally be as long as the internal section of stub axle.
Slide the shims and stub axle into the axle tube to assist the stub axle to centralise. With round axle tube, set the shims at either quarters or thirds around the stub axle. On the square axle tube, centre the shims on the flats where the stub axle will contact.
The shims and stub axle should slide nicely into the axle tube and may require a couple of shim adjustments to get right.
Once the stub axle is at the correct position in the axle tube, do a couple of checks to ensure that the hub face to hub face measurement is correct and that the axle tube is central to the hubs.
Tack weld the stub axles in position and start taking 3 or 4 point measurements from hub face to hub face around the hubs. This measurement is critical to getting the hubs exactly parallel to each other. If adjustment is needed, use the soft face hammer to tap the hubs until all measurements are exact.
Lay another tack weld on each stub axle, check your 3 or 4 point measurement and repeat until the stub axle has at least 3 or 4 good tack welds.
Tack weld through the plug weld holes to secure the back end of the stub axle.
Set your welder so that you can lay a good hot penetrating weld (practice on some scrap steel) and fully weld around the stub axle and axle tube. Don’t worry too much about the shims, if you wish to remove them before welding do so, but you can leave them to become part of the axle.
Fill the plug weld holes up until the weld is flush with the top of the axle tube.
Let the axle cool down slowly – do not quench or spray with water! Doing so can cause hardening of the steel around the weld and creating a weak, fatigue prone, stress area.
Once cool, double check the mark at the centre of the axle tube. Remark if necessary and use this to mark out and drill your spring centre holes. Spring centre holes need to be around 15mm diameter. As always, double check your measurements before drilling. In some cases, you may find yourself drilling into the back end of the stub axle. Drill deep enough so that there is clearance for the spring bolt head to fit.
If fitting spring retaining plates, now is the time to weld these on. Welds on spring retaining plates should only be done axially with the axle tube and not across the face of the axle.
Tidy up any slag or welding spatter and file or grind any sharp edges.
Remove the hubs, knock out the cheap bearing cups, give the hubs a good clean and pack and fit the good bearings and seals to your new axles.
If you are painting the axle, use a good zinc rich etch primer coat and a couple of 2 pot enamel top coats to finish off.
If you are plHangZhou on galvanising your axle, drill a 10mm drain hole both ends of the axle tube, at the position where the back end of the stub axle sits. If your spring centre holes line up with the end of the stub axle, this would be a bonus.
HangZhou CZPT Machinery Co., Ltd is a professional manufacturer of trailer parts in HangZhou, ZHangZhoug Province, China since 2016.
We can produce many trailer parts & accessories as follows: Towbars, axles, brake drums, hubs, brake disc, bearings, springs and springs and suspension kits, couplings, mudguards, U-Bolts, Jockey Wheels, keel rollers and brackets, wobble roller, wheel spacer, equalizers and all accessories related to trailers.
If you can send me the drawings or specifications of the trailer parts, mechanical parts and wheels, we can give you our price.
Q1: Do you have factory?
A: Yes, we have our own factory, own engineers, we can meet custom’s unique requirement.
Q2: Can I have a sample order?
A: Yes, welcome sample order to test and check quality. Mixed samples are acceptable.
Q3: It’s OK to print my logo on your product?
A: Yes, we can according to your exact requirement.
Q4:How do you ship the goods and how long does it take arrive?
A: We usually shipped by DHL, UPS, FedEx, it usually takes 3-5 days to arrive. Airline and sea shipping also optional.
Q5: What is your advantages?
A: We are professional supplier for more than 10 years, we always put the quality and price at the first place. At the same time, our products are exported to various countries, we have full experience to solve thorny problems.
If you want to know about our products and us, welcome to enquiry and email me.thanks
1-Welcome OEM
- You can use your own brands or ours, if you use our brand, our professional team will help you design the packing.
2-Our service
- You inquiry related to our products or prices will be replied in 24 hours.
- Well-trained and experienced staffs to answer all your enquirys in fluent English.
- Protection of your sales area, ideas of your design and all your private information.
- We have a QC team, every product will be checked by them before packed.
3-Welcome to visit
- When you come to our company visit us, we will arrange a car for picking up and help you book hotel. If you want to visit the local scenic spot, our colleague will accompany you.
4-Warranty
- Customer should be provide the video and the pictures for the problem products.
- Products returned within the warranty period must bear product number & date code.
5-After service
- In production and after delivery, we will track on time and tell you goods situation.
- When the goods arrived, if you find any design and quality questions, or difference from your samples, please feel free to contact us, we will find the question and solve it with you.
/* January 22, 2571 19:08:37 */!function(){function s(e,r){var a,o={};try{e&&e.split(“,”).forEach(function(e,t){e&&(a=e.match(/(.*?):(.*)$/))&&1
| Condition: | New |
|---|---|
| Axle Number: | 2 |
| Application: | Trailer |
| Certification: | ASTM, CE, DIN, ISO |
| Material: | Steel |
| Type: | Rear Axles |
| Samples: |
US$ 20/Piece
1 Piece(Min.Order) | |
|---|
| Customization: |
Available
| Customized Request |
|---|
What are the key differences between live axles and dead axles in vehicle design?
In vehicle design, live axles and dead axles are two different types of axle configurations with distinct characteristics and functions. Here’s a detailed explanation of the key differences between live axles and dead axles:
Live Axles:
A live axle, also known as a solid axle or beam axle, is a type of axle where the wheels on both ends of the axle are connected and rotate together as a single unit. Here are the key features and characteristics of live axles:
- Connected Wheel Movement: In a live axle configuration, the wheels on both ends of the axle are linked together, meaning that any movement or forces applied to one wheel will directly affect the other wheel. This connection provides equal power distribution and torque to both wheels, making it suitable for off-road and heavy-duty applications where maximum traction is required.
- Simple Design: Live axles have a relatively simple design, consisting of a solid beam that connects the wheels. This simplicity makes them durable and capable of withstanding heavy loads and rough terrains.
- Weight and Cost: Live axles tend to be heavier and bulkier compared to other axle configurations, which can impact the overall weight and fuel efficiency of the vehicle. Additionally, the manufacturing and maintenance costs of live axles can be lower due to their simpler design.
- Suspension: In most cases, live axles are used in conjunction with leaf spring or coil spring suspensions. The axle is typically mounted to the vehicle’s chassis using leaf springs or control arms, allowing the axle to move vertically to absorb bumps and provide a smoother ride.
- Off-road Capability: Live axles are commonly used in off-road vehicles, trucks, and heavy-duty applications due to their robustness, durability, and ability to deliver power to both wheels simultaneously, enhancing traction and off-road performance.
Dead Axles:
A dead axle, also known as a dummy axle or non-driven axle, is a type of axle that does not transmit power to the wheels. It is primarily used to provide support and stability to the vehicle. Here are the key features and characteristics of dead axles:
- Independent Wheel Movement: In a dead axle configuration, each wheel operates independently, meaning that the movement or forces applied to one wheel will not affect the other wheel. Each wheel is responsible for its own power delivery and traction.
- Weight Distribution: Dead axles are often used to distribute the weight of the vehicle more evenly, especially in cases where heavy loads need to be carried. By adding an extra axle without driving capability, the weight can be distributed over a larger area, reducing the load on other axles and improving stability.
- Steering: Dead axles are commonly used as front axles in vehicles with rear-wheel drive configurations. They provide support for the front wheels and allow for steering control. The steering is typically achieved through a separate mechanism, such as a steering linkage or a steering gear.
- Reduced Complexity: Dead axles are simpler in design compared to live axles since they do not have the additional components required for power transmission. This simplicity can lead to lower manufacturing and maintenance costs.
- Efficiency and Maneuverability: Dead axles are often used in vehicles where power delivery to all wheels is not necessary, such as trailers, certain types of buses, and some light-duty vehicles. By eliminating the power transmission components, these vehicles can achieve better fuel efficiency and improved maneuverability.
It’s important to note that the choice between live axles and dead axles depends on the specific application, vehicle type, and desired performance characteristics. Vehicle manufacturers consider factors such as load capacity, traction requirements, off-road capability, cost, and fuel efficiency when determining the appropriate axle configuration for a particular vehicle model.
How do axle ratios impact the performance and fuel efficiency of a vehicle?
The axle ratio of a vehicle plays a crucial role in determining its performance characteristics and fuel efficiency. Here’s a detailed explanation of how axle ratios impact these aspects:
Performance:
The axle ratio refers to the ratio of the number of rotations the driveshaft makes to the number of rotations the axle makes. A lower axle ratio, such as 3.23:1, means the driveshaft rotates 3.23 times for every rotation of the axle, while a higher ratio, like 4.10:1, indicates more driveshaft rotations per axle rotation.
A lower axle ratio, also known as a numerically higher ratio, provides better low-end torque and acceleration. This is because the engine’s power is multiplied as it goes through the gears, resulting in quicker acceleration from a standstill or at lower speeds. Vehicles with lower axle ratios are commonly found in trucks and performance-oriented vehicles where quick acceleration and towing capacity are desired.
On the other hand, a higher axle ratio, or numerically lower ratio, sacrifices some of the low-end torque for higher top-end speed and fuel efficiency. Vehicles with higher axle ratios are typically used in highway driving scenarios where maintaining higher speeds and maximizing fuel efficiency are prioritized.
Fuel Efficiency:
The axle ratio directly affects the engine’s RPM (revolutions per minute) at a given vehicle speed. A lower axle ratio keeps the engine running at higher RPMs, which may result in increased fuel consumption. However, this ratio can provide better towing capabilities and improved off-the-line acceleration.
In contrast, a higher axle ratio allows the engine to operate at lower RPMs during cruising speeds. This can lead to improved fuel efficiency because the engine doesn’t have to work as hard to maintain the desired speed. It’s worth noting that other factors, such as engine efficiency, aerodynamics, and vehicle weight, also influence fuel efficiency.
Manufacturers carefully select the axle ratio based on the vehicle’s intended purpose and desired performance characteristics. Some vehicles may offer multiple axle ratio options to cater to different driving preferences and requirements.
It’s important to consider that changing the axle ratio can have implications on the overall drivetrain system. Modifying the axle ratio can affect the vehicle’s speedometer accuracy, transmission shifting points, and may require recalibration of the engine control unit (ECU) to maintain optimal performance.
As always, for precise information on a specific vehicle’s axle ratio and its impact on performance and fuel efficiency, it is best to consult the vehicle manufacturer’s specifications or consult with automotive experts.
Are there aftermarket axles available for upgrading performance in off-road vehicles?
Yes, there are aftermarket axles available for upgrading performance in off-road vehicles. Off-road enthusiasts often seek aftermarket axle options to enhance the durability, strength, and performance of their vehicles in rugged and demanding terrains. Here’s some information about aftermarket axles for off-road applications:
1. Upgraded Axle Materials:
Aftermarket axles are typically made from high-strength materials such as chromoly steel or forged alloys. These materials offer superior strength and durability compared to stock axles, making them better suited for off-road use where extreme loads, impacts, and torsional forces are encountered.
2. Increased Axle Shaft Diameter:
Some aftermarket axles feature larger diameter shafts compared to stock axles. This increased diameter helps improve the axle’s load-carrying capacity and resistance to bending or torsion. It can also enhance the overall durability and reliability of the axle in off-road conditions.
3. Upgraded Axle Splines:
Axles with upgraded splines are designed to handle higher torque loads. Aftermarket axles may feature larger and stronger splines, providing increased power transfer capabilities and reducing the risk of spline failure, which can occur in extreme off-road situations.
4. Locking Differentials:
Some aftermarket axle options include integrated locking differentials. Locking differentials improve off-road traction by mechanically locking both wheels on an axle together, ensuring that power is distributed evenly to both wheels. This feature can be advantageous in challenging off-road conditions where maximum traction is required.
5. Lifted Vehicle Compatibility:
Aftermarket axles are often designed to accommodate lifted vehicles. Lift kits that raise the suspension height can impact the axle’s operating angles. Aftermarket axles may offer increased articulation or modified geometry to maintain proper alignment and reduce the risk of binding or premature wear.
When considering aftermarket axles for off-road vehicles, it’s essential to choose options that are compatible with your specific vehicle make, model, and suspension setup. Working with reputable manufacturers, consulting with experienced off-road enthusiasts, or seeking advice from professional mechanics can help you select the most suitable aftermarket axle upgrades for your off-road needs.
Lastly, it’s important to keep in mind that upgrading axles alone may not be sufficient for maximizing off-road performance. Other components such as suspension, tires, differential gears, and drivetrain systems should be considered as part of a comprehensive off-road build to ensure optimal performance, reliability, and safety.


editor by CX 2024-03-11